See my earlier posts How to Make a Returning Boomerang and Boomerangs are awesome! for more info about boomerangs.
The non-returning boomerang, aka rabbitstick was a ubiquitous and important weapon among hunter-gatherer cultures around the world, especially those living in open environments like desert, scrubland, and grassland.
The rabbitstick was used, obviously, to hunt rabbits, but also many other animals such as ground fowl, squirrels, and even large ungulates such as deer. The rabbitstick could instantly kill smaller animals when struck, but could also take down deer and antelope since it could break their legs, rendering them unable to flee.
The rabbitstick took many forms, but was always flattened and a foot to several feet long, and was usually bent along its length. Being thrown bend-first (with the V facing forward), the angle gave more force to the blow if it hit properly since the momentum would be directed along the length, striking with a smaller area of the weapon.
The rabbitstick was superior to a regular stick since the modification to be flat, bent, and with airfoils allowed it to travel much longer distances. A proper rabbitstick could be thrown with enough force to kill up to 200 yards, whereas a stick could only be thrown at most third of that distance. The flat shape, beyond enhancing flight distance, gave a more powerful blow since it concentrated the force to a small area.
The rabbitstick is fairly simple to make, and would be a great weapon to fashion in a survival situation. It is also pretty effective as a hunting weapon in general since it makes a two or three foot by 600 ft long killing zone. Compared to a bow and arrow or even a rifle, the rabbitstick may be better to hunt for medium-sized ground game in open areas, in such situations being only inferior to a shotgun.
Here are some basic instructions how to make one. More in-depth treatments of how to make rabbitsticks with different methods can be found in these blog posts: https://naturalskills.wordpress.com/2011/01/27/non-returning-boomerangs/ and https://naturalskills.wordpress.com/2011/06/17/boomerang-build-a-long/(also an awesome blog in general), and in the Bulletin of Primitive Technology #4 (1992) article by Errett Callahan “The non-returning boomerang.” Callahan (1999) has a similar article in a book (see reference).
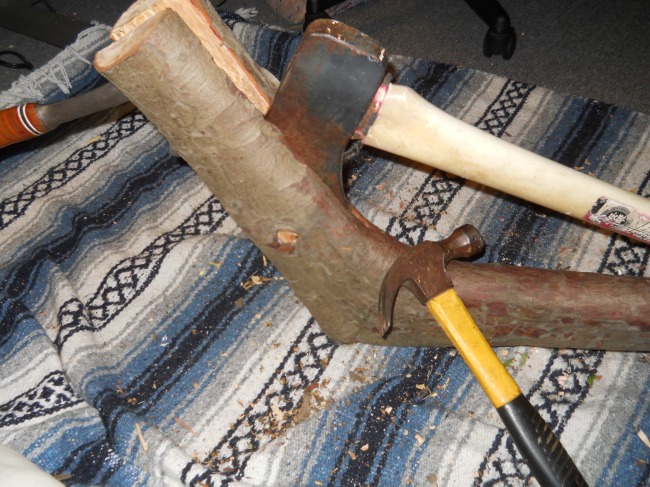
1) find a piece of wood. It should have the bend of the angle you are looking for. If you try to artificially make a bend in an otherwise straight piece, you will have to cut across the grain, weakening the rabbitstick at the bend. It should be wide and thick enough to end up after trimming bark and shaping to be several inches wide by about an inch thick. The heavier the wood, the better. If you don’t have a saw or don’t want to use one, take into account the splitting ability of the wood. Many pines and cedars split cleanly. I chose incense cedar (Calocedrus decurrens) since it was easy to find a flattened, well-bent piece, and I knew it would split easily. This wood is not particularly heavy though, so I made the boomerang pretty wide to give it some heft. Another benefit to using this tree species is that it makes an excellent hearth-board for friction fire starting (the board you put a hole in that you spin a stick on), being used by many Californian Indians for this purpose.
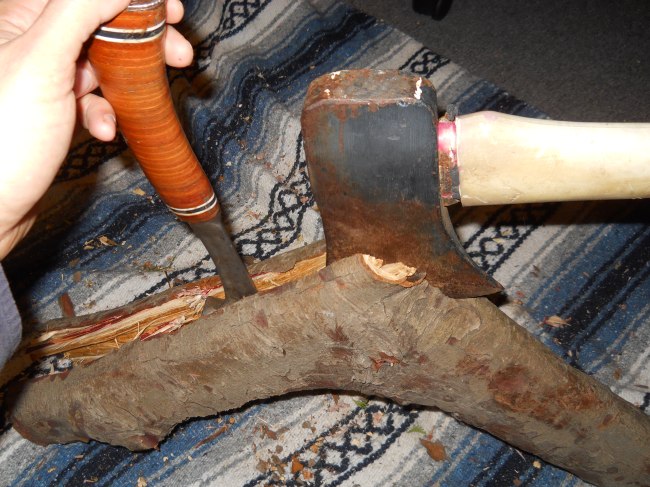
2) cut it to size then split it down the middle. You will need at least two wedges and a mallet, which can be fairly easily obtained in primitive situations. A very hard wood, bone, or best, antler, ground to shape makes a good wedge. A hard wood or rock makes a good mallet. I used a hatchet and splitting axe in place of wedges and a hammer for a mallet. I started the split on one end, got stuck in the middle so started again there, and to keep it splitting in the center, started a split once more at the other end. Pics below show this:
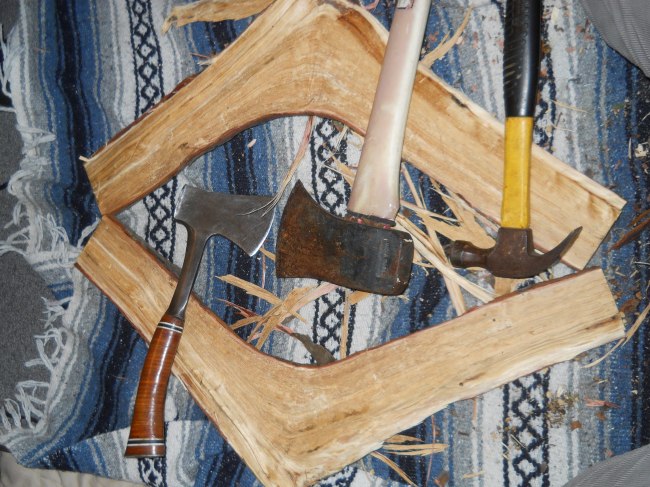
3) choose the better half and split that. Put your wedge in the center at one end (pictured below) and work it as far as you can. It may veer off and you’ll have to start at the other end and middle. If it won’t split at all just trim with your hatchet, knife, or saw. It should be only an inch or so thick uniformly along the length. I used the piece to the left in the below photo.
4) trim the split piece to size, giving one end a good hand grip, and making the edges pointed. It should be somewhat elliptical in cross section like this shape: (), with the edges near the center of its thickness. The cross section of mine was more rhomboid or diamond-like, like this shape: <==>. Callahan (1999) discusses the effects different airfoils and edge shapes have on the flight of the non-returning boomerang. Most importantly, if the edges are too blunt or too near the top or bottom, it may not fly well. The finished rabbitstick should weigh about 12 ounces for optimum performance (Callahan 1999)
Here is my finished (I left it pretty rough) rabbitstick. It’s about 1/2 to 3/4 inch thick throughout the length, and 1.5 to 2.5 in wide on the ends, with the max width of 5 in in the middle. The end I’m holding is more elliptical in cross section to make a good grip, while the other end is more flat on the top and bottom, with edges angled like an axe blade.
Tips:
Many different shapes and sizes will work.
The most important factors are keeping it flat, straight, and with edges along the centerline. A good bend helps, but it may also be more of a gradual curve like this shape: (.
You can work the wood green (which is better for splitting or using stone tools), but keep in mind it may warp when dry. You can take steps to secure it in shape as it dries, or bend it back to shape after it warps by applying oil or grease and heating it steaming hot over a fire, bending it to shape, and allowing it to cool while holding it in shape.
Disclaimer: I take no responsibility for any injury or death resulting from any information in this blog.
REFERENCE
Callahan, Errett. 1999. How to make a throwing stick: the non-returning boomerang. In D. Wescott (ed.) Primitive Technology: a book of earth skills. Gibbs Smith, Publisher, Layton UT.

