Monthly Archives: June 2014

Russians Put Frog in Milk to Prevent Spoilage

Follow my move to Ancestral Arts!

Ancestral Arts

Russians Put Frog in Milk to Prevent Spoilage

Click on the title to link to the original scientific article describing how they found many antimicrobial compounds secreted by frog’s skin.

This study was inspired by the old practice of Russians in putting frogs in their milk to keep it fresh!

1280px-European_Common_Frog_Rana_temporaria Rana temporaria. Credit: Wikipedia

The ancestral art of keeping milk fresh had a clever, simple solution for Russians; put a russian brown frog, aka the common frog (Rana temporaria) in it! This frog (which ranges across Europe and has many congeners across temperate areas such as the US) secretes a battery of antimicrobial compounds, preventing the milk from bacterial or fungal growth and souring.

I doubt it affected the milk flavor much if at all. I don’t think it’s disgusting; what sure is gross though is tasting or smelling rotten milk!

The only other way known to…

View original post 70 more words

New Map of Old North America Shows Indian Tribal Nations; what causes variation in tribe density?

To stay updated, please follow my blog’s move to AncestralArts.net !

Ancestral Arts

Aaron Carapella has compiled all the original (self-identified) names of the American Indians on a map showing the locations of their original homes. It immediately gives a sense of the extent and variety of Indians occupying the continent.

See the full story here: The Map of Native American Tribes You’ve Never Seen Before

Or go straight to the PDF file of the map: Tribal_Nations_Map_of North America

There is a separate map for Mexico you can find in the article.

Ethnoecological hypotheses for high density of Indian tribes and populations in California and the coastal Pacific Northwest:

Like other similar maps produced before (which usually show the names colonists gave to Indians, such as “Costanoan” for SF Bay Area Indians, which just means inhabiting the coast), another remarkable feature is the high diversity of tribes in California, as well as the Pacific Coast. I’d attribute this high diversity, which goes along…

View original post 793 more words

Bug Honeydew was a Sweet Treat for California Indians

Ringtail Cats has moved on to AncestralArts.net !
Please follow me there!

Ancestral Arts

Certain insects in the true bug order are specialized to only feed on plant sap, including all aphids (Aphidae) and scales (Coccidae), and most of the planthoppers, leafhoppers, froghoppers, and cicadas (Hemiptera:Auchenorrhyncha aka Homoptera). These insects have syringe-like mouthparts to pierce the sap and/or water-conducting vessels of leaves, veins, stems, and fruits. Their adaptation to their extremely watery diet has also given rise to a very long intestinal tract with which they can absorb most of the nutrients of the sap before it passes out. But this still isn’t enough to absorb the sap’s sugars and other nutrients completely, so their frass (insect excrement) is very sweet.

A) shows an aphid piercing plant tissue with its syringe-like mouthpart B) shows how this stylet pierces a single cell (in this case making it ideal for sampling cell contents for an experiment by a plant physiologist) Credit: http://5e.plantphys.net/article.php?ch=t&id=136

This sugar-rich exudation of…

View original post 678 more words

How to Make Moccasins: a Photo Guide

Please follow my new blog, AncestralArts.net !!

Ancestral Arts

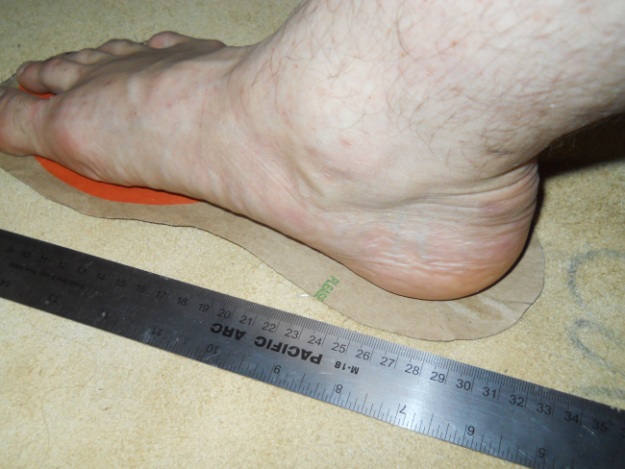
1) First, trace your foot on some paper to make the pattern for the sole. You should leave a centimeter or so space between your foot and the edge of the pattern:

Image

Image

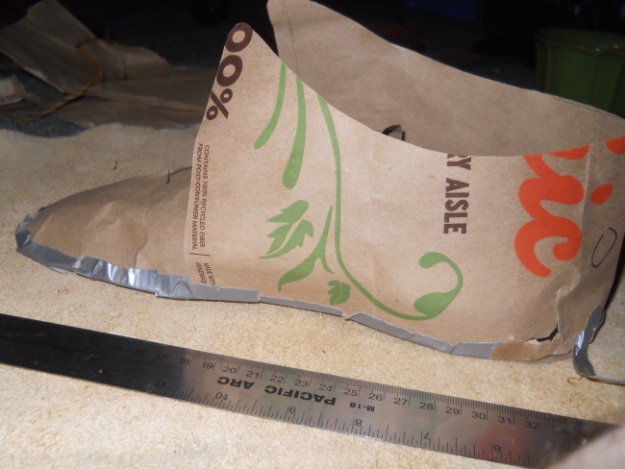
2) Trace these other patterns based on the size of the sole pattern. Analyze the below photos to determine the relative shapes / sizes. See step the third photo below to better size the tongue pattern (pattern on right side). Basically it should cover the top of your foot and its sides wrap around to meet the edges of the sole pattern with sufficient space (~ 1cm) to stitch.

Image

ImageImage

4) Check the patterns have the right size and shape by lightly taping the edges to form a model of the moccasin.

Image

Image

5) After correcting for any size / shape problems revealed by the model, trace the patterns onto your leather (or other material of choice). Be sure to…

View original post 601 more words

Fried Fiddleheads and Further Functions of Ferns

Please follow my new blog address: AncestralArts.net !!

This is my first post on Ancestral Arts, where and I have already re-blogged most of my posts from here on Ringtail Cats. Ancestral Arts also has new and better pages!

My goal is public awareness of ethnobiology and the resulting appreciation for nature given its inherent worth and complete set of uses to fulfill life’s needs. AncestralArts.net is simply a more descriptive and memorable web address to further the cause.

For a while, I will keep re-blogging what I post on Ancestral Arts here on Ringtail Cats, but please follow me on Ancestral Arts to insure getting all future posts! Thanks readers!!!

Ancestral Arts

The fiddleheads of most (if not all) species of ferns are edible. The fiddlehead refers to the unfurling young fronds that appear in late winter through spring, appearing singly for new plants, or at the base or middle of full-grown ferns. They can be eaten raw, but are better after being lightly fried.

The species pictured below, Polystichum munitum (Kaulf.) C. Presl, aka western sword fern, is very common in the east bay hills. Also pictured below are its fiddleheads that I fried and ate this spring.

Image

Image

Image

It is somewhat asparagus-like in flavor and texture. It makes a great side dish or could be an important survival food if lost in a fern-rich area.

Other uses:

Fronds of Polystichum munitum were also used by the Kashaya Pomo Indians of California to line earth pit ovens for slow-cooking many types of foods, as well as to line basins formed in sand…

View original post 493 more words

How to Make a Rabbitstick (non-returning boomerang)

See my earlier posts How to Make a Returning Boomerang and Boomerangs are awesome! for more info about boomerangs.

The non-returning boomerang, aka rabbitstick was a ubiquitous and important weapon among hunter-gatherer cultures around the world, especially those living in open environments like desert, scrubland, and grassland.

The rabbitstick was used, obviously, to hunt rabbits, but also many other animals such as ground fowl, squirrels, and even large ungulates such as deer. The rabbitstick could instantly kill smaller animals when struck, but could also take down deer and antelope since it could break their legs, rendering them unable to flee.

The rabbitstick took many forms, but was always flattened and a foot to several feet long, and was usually bent along its length. Being thrown bend-first (with the V facing forward), the angle gave more force to the blow if it hit properly since the momentum would be directed along the length, striking with a smaller area of the weapon.

The rabbitstick was superior to a regular stick since the modification to be flat, bent, and with airfoils allowed it to travel much longer distances. A proper rabbitstick could be thrown with enough force to kill up to 200 yards, whereas a stick could only be thrown at most third of that distance. The flat shape, beyond enhancing flight distance, gave a more powerful blow since it concentrated the force to a small area.

The rabbitstick is fairly simple to make, and would be a great weapon to fashion in a survival situation. It is also pretty effective as a hunting weapon in general since it makes a two or three foot by 600 ft long killing zone. Compared to a bow and arrow or even a rifle, the rabbitstick may be better to hunt for medium-sized ground game in open areas, in such situations being only inferior to a shotgun.

Here are some basic instructions how to make one. More in-depth treatments of how to make rabbitsticks with different methods can be found in these blog posts: https://naturalskills.wordpress.com/2011/01/27/non-returning-boomerangs/ and https://naturalskills.wordpress.com/2011/06/17/boomerang-build-a-long/(also an awesome blog in general), and in the Bulletin of Primitive Technology #4 (1992) article by Errett Callahan “The non-returning boomerang.” Callahan (1999) has a similar article in a book (see reference).

1) find a piece of wood. It should have the bend of the angle you are looking for. If you try to artificially make a bend in an otherwise straight piece, you will have to cut across the grain, weakening the rabbitstick at the bend. It should be wide and thick enough to end up after trimming bark and shaping to be several inches wide by about an inch thick. The heavier the wood, the better. If you don’t have a saw or don’t want to use one, take into account the splitting ability of the wood. Many pines and cedars split cleanly. I chose incense cedar (Calocedrus decurrens) since it was easy to find a flattened, well-bent piece, and I knew it would split easily. This wood is not particularly heavy though, so I made the boomerang pretty wide to give it some heft. Another benefit to using this tree species is that it makes an excellent hearth-board for friction fire starting (the board you put a hole in that you spin a stick on), being used by many Californian Indians for this purpose.

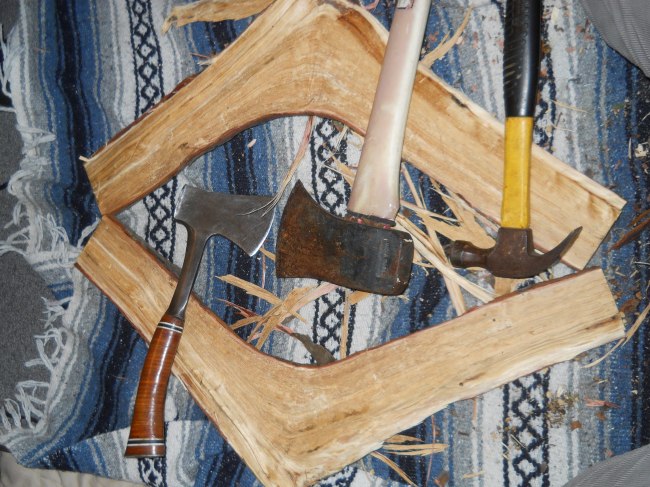
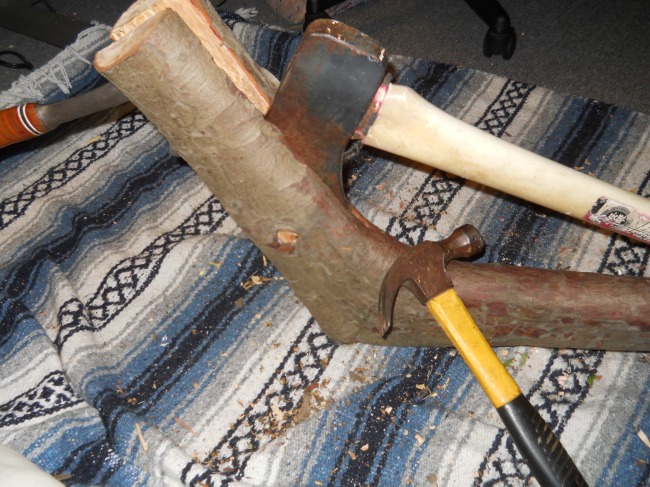
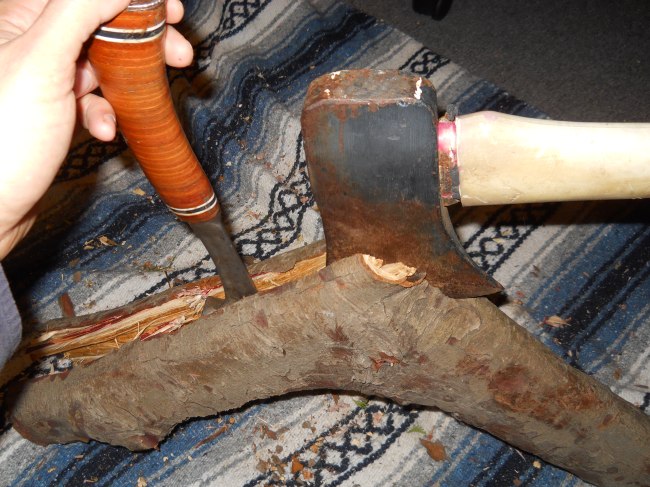
2) cut it to size then split it down the middle. You will need at least two wedges and a mallet, which can be fairly easily obtained in primitive situations. A very hard wood, bone, or best, antler, ground to shape makes a good wedge. A hard wood or rock makes a good mallet. I used a hatchet and splitting axe in place of wedges and a hammer for a mallet. I started the split on one end, got stuck in the middle so started again there, and to keep it splitting in the center, started a split once more at the other end. Pics below show this:
Image

Image

Image

Image

3) choose the better half and split that. Put your wedge in the center at one end (pictured below) and work it as far as you can. It may veer off and you’ll have to start at the other end and middle. If it won’t split at all just trim with your hatchet, knife, or saw. It should be only an inch or so thick uniformly along the length. I used the piece to the left in the below photo.

Image

4) trim the split piece to size, giving one end a good hand grip, and making the edges pointed. It should be somewhat elliptical in cross section like this shape: (), with the edges near the center of its thickness. The cross section of mine was more rhomboid or diamond-like, like this shape: <==>. Callahan (1999) discusses the effects different airfoils and edge shapes have on the flight of the non-returning boomerang. Most importantly, if the edges are too blunt or too near the top or bottom, it may not fly well. The finished rabbitstick should weigh about 12 ounces for optimum performance (Callahan 1999)

Here is my finished (I left it pretty rough) rabbitstick. It’s about 1/2 to 3/4 inch thick throughout the length, and 1.5 to 2.5 in wide on the ends, with the max width of 5 in in the middle. The end I’m holding is more elliptical in cross section to make a good grip, while the other end is more flat on the top and bottom, with edges angled like an axe blade.

Image

Tips:

Many different shapes and sizes will work.

The most important factors are keeping it flat, straight, and with edges along the centerline. A good bend helps, but it may also be more of a gradual curve like this shape: (.

You can work the wood green (which is better for splitting or using stone tools), but keep in mind it may warp when dry. You can take steps to secure it in shape as it dries, or bend it back to shape after it warps by applying oil or grease and heating it steaming hot over a fire, bending it to shape, and allowing it to cool while holding it in shape.

Disclaimer: I take no responsibility for any injury or death resulting from any information in this blog.

REFERENCE

Callahan, Errett. 1999. How to make a throwing stick: the non-returning boomerang. In D. Wescott (ed.) Primitive Technology: a book of earth skills. Gibbs Smith, Publisher, Layton UT.

How to Make a Returning Boomerang

A returning boomerang is not just a cool toy: this is a weapon useful for killing birds in flocks, and as a hawk decoy to flush waterbirds into nets.

What do you call a non-returning boomerang? A stick!… Not! Actually, although what most think of as a “boomerang” is the returning kind, most boomerangs used traditionally by Australian Aborigines were non-returning, but still specially designed to be thrown long distances in a straight line to deliver a lethal blow, as well as used for many other purposes.

See my post Boomerangs are Awesome! for background info and more about technical principles about boomerangs.

Steps to make a returning boomerang:

1) obtain a section of wood with a bend measuring 90-120 degrees. It must be from a fork, or bent root so the grain follows the bend. If you cut the proper angle into a straight piece, the boomerang will be weak and liable to break at the bend. It should be fairly straight and flat besides the bend. I chose blue gum eucalyptus wood, which is not particularly good for carving, but is very abundant around here and had that Australian authenticity to it.

2) cut it to equal lengths from the bend and cut that in half. I used a saw but for straight-grained, easily split wood, you can split it with a hatchet or axe and wedge.

DSCN0746

3) thin it down and carve airfoils on both ends, facing opposite directions and blending at the center bend.

boomerang constructionDSCN0748DSCN0750DSCN0752

4) once you’ve finished the airfoils, round the ends. The below photo shows all the tools I used so far with the unfinished boomerang in the middle and the unworked half on the right.

DSCN0753

5) carve flutings along the length of the top of the airfoils using a small gauge.

DSCN0756DSCN0759

6) slightly round the bottom of the front of the airfoils, cutting off this bottom front corner with a single knife sweep.

DSCN0758

7) to bend the boomerang at the middle, to give it a positive dihedral shape (meaning if you put the flat bottom of one end of the boomerang on a flat surface the other end will stick up), cover it in oil or grease (I used olive oil) and slowly heat it up til it’s too hot for bare hands over a fire or stove (try not to scorch it), then bend it to the desired shape while it’s hot and hold it like that til it’s cooled. This took quite a bit of strength and using a bench to leverage against. Be careful not to crack the wood. The photo below shows the positive dihedral I put on it.

DSCN1132

8) throw it to test it out. Obviously you need a big field with no danger of hitting others. You should throw it with the V facing forward and the ends straight up and down. There should be a constant breeze to your front that you throw at an angle of 45-90 degrees from. Depending on the flight pattern, you may need to reduce weight, change the dihedral, or make other adjustments to get a full return. See these websites’ tips on throwing and tuning:

http://www.angelfire.com/nc/conally/manual.html

http://www.boomerangs.com/tuning.html

http://www.boomerangs.com/howtothrow.html

9) WARNING/DISCLAIMER: a wooden boomerang is a dangerous weapon. Make sure to always throw it in a manner to avoid hurting yourself and others. I take no responsibility for your safety in making or using a boomerang.